Free Copy Stand Focus Target
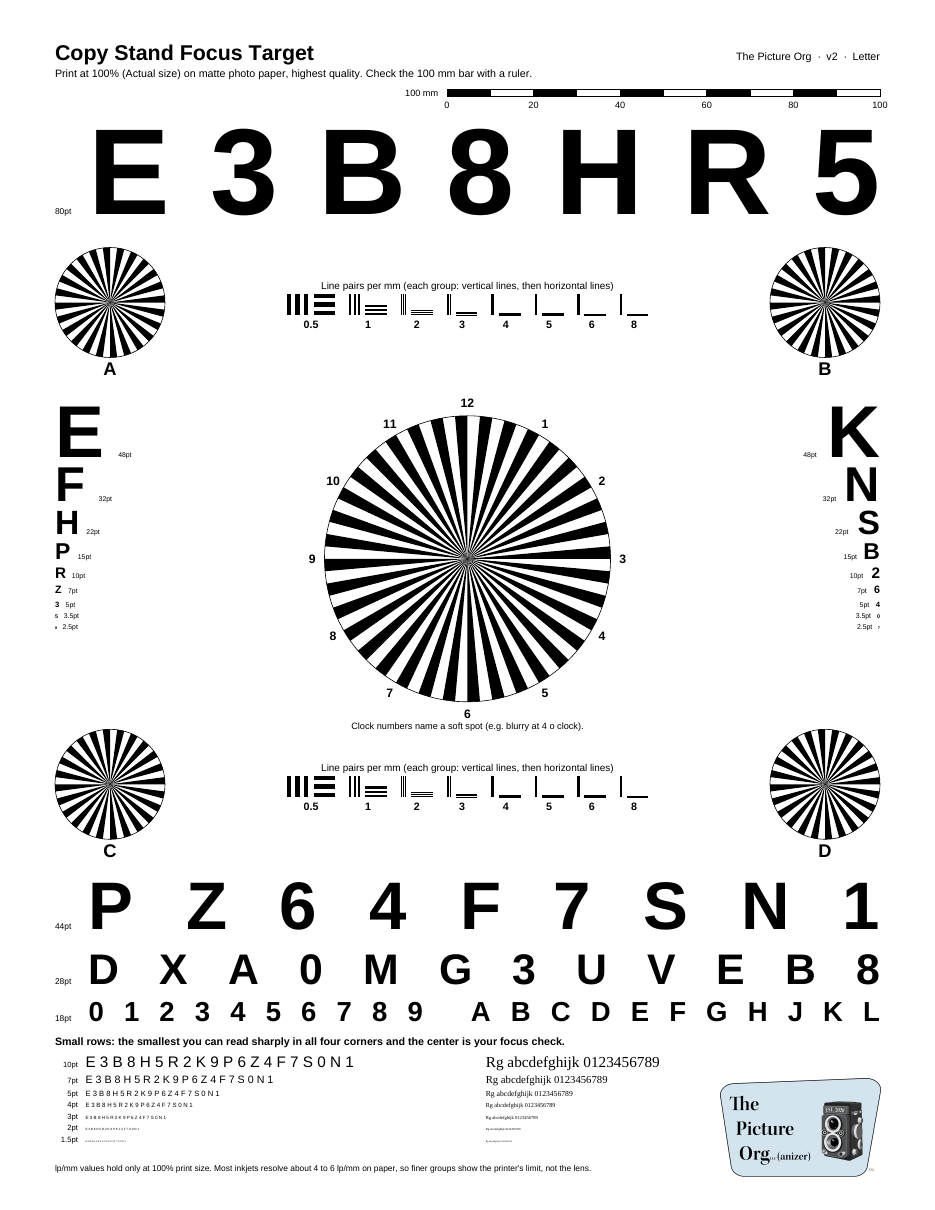
Print it at 100% on matte photo paper and use it to check focus across the whole frame when camera-scanning photos and negatives. It has Siemens stars in the center and corners, line pair groups from 0.5 to 8 lp/mm, letters and numbers from 80 pt to 1.5 pt, and a 100 mm scale bar to check the print size.
Download for US Letter (PDF)Download for 8 x 10 paper (PDF)Download for A4 (PDF)Download for 20 x 25 cm (PDF)
How to use it
- Print at Actual size (100%), not "Fit to page", on matte photo paper in the size you downloaded (US Letter, 8 x 10, A4 or 20 x 25 cm) at your printer's highest quality. Measure the 100 mm bar with a ruler to be sure.
- Use photo paper, not plain paper. Photo paper is about as thick as the prints you scan, so the target sits at the same height and your focus carries over to the real photos.
- Lay it flat on the copy stand where your photos go, and focus on the center star.
- Take a picture and zoom in to 100% on all four corner stars. If they're as sharp as the center, your camera is square to the stand.
- The smallest line pairs and letters you can still read show what your setup resolves. Most inkjets print down to about 4 to 6 lp/mm, so finer groups show the printer's limit, not your lens.
- Expect some softness up close. A print is made of tiny dots, so when you zoom in far you'll also see the fuzziness your printer adds. That's the paper, not your camera.
A quick check with Live Preview
Turn on Live Preview in your photo scanning setup and focus on the target. Then swap the target for a photo and focus again. If everything is working, you shouldn't be able to see the focus on the photo change when you refocus.
It's free to use and share. For our software for camera scanning, see The Well Tools.